Saturday, September 30, 2006

Cherish Happiness


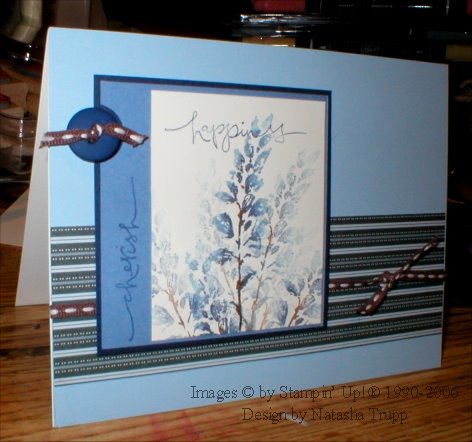
For this card, I was trying to make a "wow" card without using tons of layers. It still has 4 layers, but they are in smaller parts. For the watercolouring look, I blended my markers directly on the stamp. I started backwards (gasp! with the darkest colour first, I always do). So I did the chocolate chip stem, then night of navy, brocade blue, and last bashful blue. I start with the darkest colour first because then I "take" ink using the next lightest colour and I blend them together. I've always had more success with blending doing it this way, no matter the medium. I would do shading and blending the "right way" while the art teachers look upon me working, but once they had their backs turned, I would do it my own way. Art's about doing what works for you, so that's why I continue to work darkest to lightest. Anyway...enough of the mini-rant...the rest of card uses a SU! button, some of the new Four Seasons designer paper (this is actually the winter one, but I designed my whole card around that paper), and some new ribbon from the Seaside Collection of Ribbon Originals, man I love that stuff. I've been busy today, so look for card updates everyday this next week!

Friday, September 29, 2006

Gold Autumn Sunset


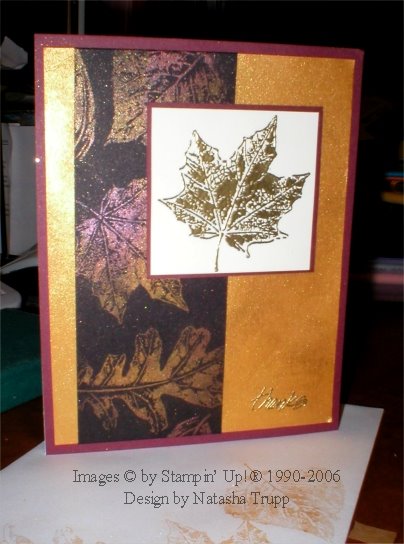
So here's one of the items I've made today on my day off! The card uses a lot of pearlex! On the black paper, I stamped the leaves in versamark, then dabbed various colours of pearl ex over top. For the shimmery mustard paper, I mixed some Aztec Gold and rubbing alcohol, then painted it over ( I didn't have any empty spritz bottles). The mustard really resembles the brushed gold now. The lone leaf and the thanks are embossed in gold.

Thursday, September 28, 2006

Coming Soon...


I haven't had much time to create much this week, but tomorrow I have the day off. I shall definitely be doing lots of fun things. I think I'll try to create a lot, then update everyday next week. However, until then, here's a little something that I sent to SU! for a contest several months ago. Clearly, it didn't win, it hasn't even made it onto the stamper's showcase, however I still think it's pretty cool :D I embossed the radio from Stay Tuned onto the whisper white. Then I carefully cut around the bottom part and slid a punched out oval (large) underneath it to create a cool retro shadowed look. Because of the whole retro feel to this card, I had to use crosshatch in the background.

Tuesday, September 26, 2006

Nothing like a challenge


To be perfectly honest, when I first saw these colours for this week's challenge, I thought they were a bit, well not something I would normally choose. So I wanted to make something cheerful, and here it is. I'm really happy with how it turned. This card is 6x4.25. In order to get the 3 panels spaced nicely, I needed a bit more cardfront, and that extra half-inch was just what I needed.

I stamped the labels first, then did reverse masking by cutting out only the center of the label on some scrap paper. I coloured the flowers with markers, stamped, then went in with my aqaupainter afterwards to blend the colours, as well to add the saffron shading.

Monday, September 25, 2006

Tutorial Announcement

After all the positive feedback and questions about my Winter Wonderland card, I have put together a tutorial, which can be found here: http://palm-pogo-lessons.blogspot.com/. I hope you find it helpful!

Sunday, September 24, 2006

Sunday: Stamping Day


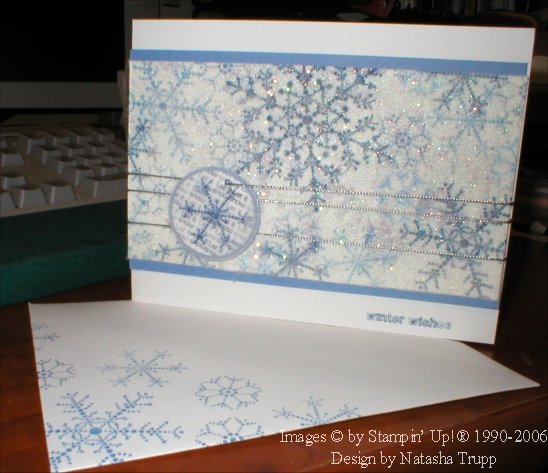
As the day progresses, I will be updating with a few projects. Technically I made this one late Saturday, but I'm still putting it here. I had an upline meeting on Friday night, and as always learned a few things! I applied one of the things I learned onto this card. Do you like the look of the glittered dryer sheets, but do not use dryer sheets? Well, my up-upline showed us that interfacing works fabulously. The glitter sticks into all the pockets. So here's my winter wonderland example, very simple, easy, and ever-so sparkly! I used the sets Snowflake Spot and Glad Tidings. I glued the interfacing on my mod-podging the main image. If you're careful with the mod podge, the inked images will not run.


4:00 PM update:
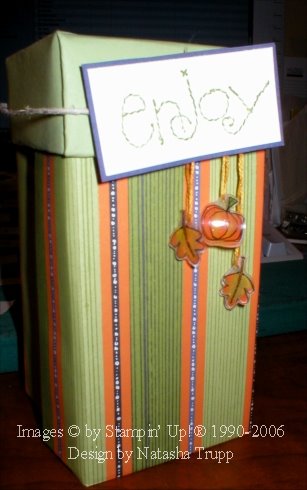
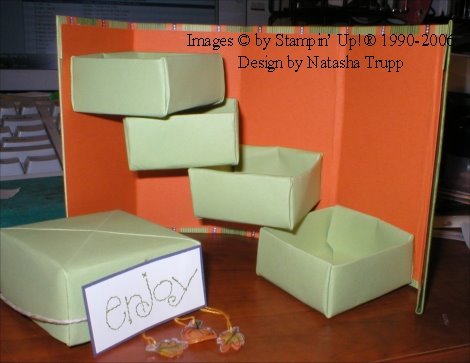
I've always wanted to try to create a stepper box. They look so neat, but I figured they were beyond my coordination. However, I used some very detailed instructions, and I also saw the process at convention, so I was able to make one. I decided to use something other Christmas papers. I did buy some of the halloween papers, so that is what I used. I only have a Halloween wheel and that didn't work with what I had in mind, so I used the autumn images from Sew Seasonal. I made little dangling shrink charms using the pumpkin and the leaf. Here's the project open. I figure I will fill this with Halloween treats for a special someone.

Saturday, September 23, 2006

Big Card Box


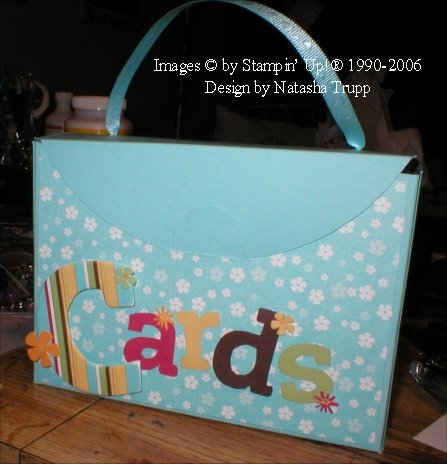
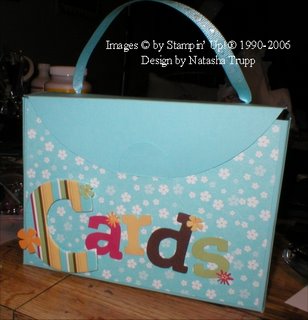
Here are the instructions to make a Big Card Box, like the one seen here. This project is actually relatively simple. All you need are 2 pieces of 12x12 cardstock, a scoring tool, a few punches of your choice, and a large round object (diameter at least 7 inches, I used a plate). The finished project is approximately 5x7x2.5.

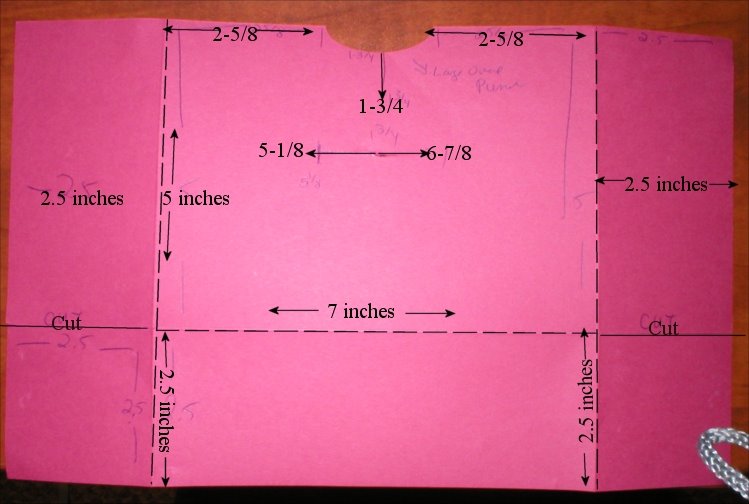
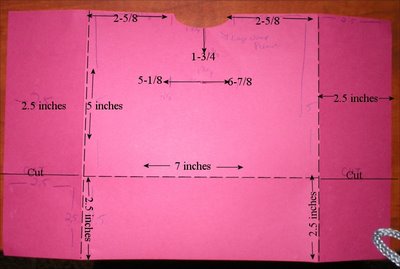
Piece 1: Take your first piece of cardstock. Cut it so it is 7.5 x 12 in size. Now score 2.5 inches on 3 sides- the 2 shorts sides, and one long side. On the side that you did not score, you may want to use a punch for extra decoration. Here I used the large oval punch. This punch measures approximately 1-3/4 inches at its widest point. To center it, I measured 5-1/8 from either side, marked a tiny little tic to serve as a guide. Cut in 2.5 inches on either side as shown in the picture. For the closure, measure 1-3/4 down from the decorative punchout. Make a cut from 5-1/8 to 6-7/8.

Picture of Piece 1:


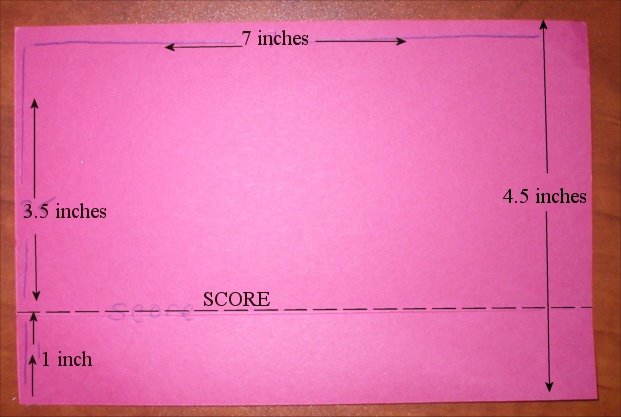
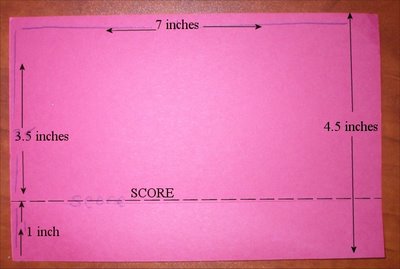
Piece 2: For this piece, take the 4.5 x 12 scrap from the first piece you just cut. Cut it so it is now 4.5 x 7. Score it at the 1 inch point.

Picture of Piece 2:

Piece 3: Take your second piece of cardstock. Score it at 2.5 inches, 7.5 inches, and 10 inches. Turn it and score at 2.5 inches and 9.5 inches. Cut away the corners so that it resembles an envelope as shown in the picture. Now, take your large circular object and trace it evenly on the section that is 5 x 2 inches. This part will be the flap. I also punched the 1/8 punch here (as far in as it would go) to serve as a place for a ribbon handle.

Picture of Piece 3:
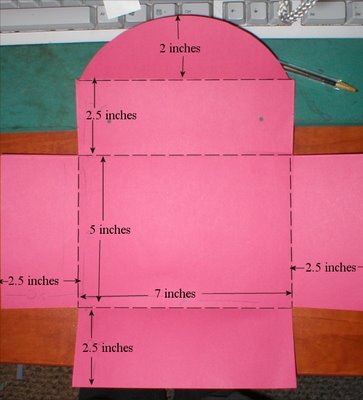

Assembly: The first piece I attached was the smallest one. Fold at the score. Attach this to the bottom of the biggest piece (#3) I bumped up the folded part all the way to the 2.5 score line (but you could center it if you wanted to). Put tape on the bottom/inside of Piece 1's bottom flap, as well as the side flaps. Attach the small sideflaps to the inside of the side pieces. Then adhere the bottom underneath Piece 3's bottom. Finally, put adhesive on Piece 3's side flaps, and attache these to Piece 1's side flaps. Lastly, make a punch out of your choosing and attach to the center of the curved flap. Adhere it so it will fit easily into the cut slit.

That's it! Decorate it, fill it with fabulous creations! For this box, I attached the designer paper to the front, back, and inside panels before putting the entire thing together. I just took 1/4 inch off each panel measurement. So the front and back are 4-3/4x6x3/4. The inside panel (which serves the purpose of hiding and holding the ribbon handle ends) is 6-3/4x2-1/4. If you are decorating the front with more embellishments keep in mind that your design should be limited to the bottom 3 inches.

It's a really simple design. The only thing that is key is scoring the right measurements so that the box will come together nicely. If you have any questions, I'll do my best to help you out, just leave a comment or contact me through SCS (username tashers).

Thursday, September 21, 2006

Simply Cardmakin' Kits


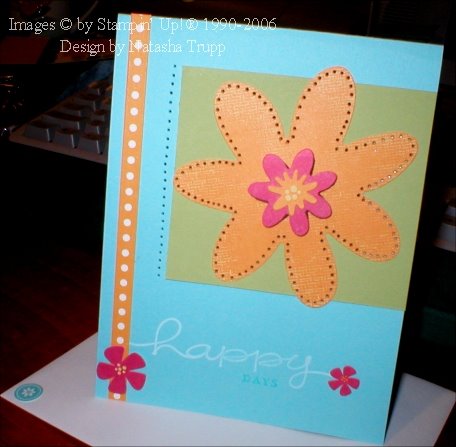
Yes, it's a lame title, but seriously, the Simply Scrappin' kits lend themselves so well to quick and easy card-making. Here's a fast card I made using the Friends & Flowers kit. I love the vibrant blend of colours in it. I also did lost of paper piercing here. It's a quick technique that adds a bit of texture to any card. The pink flower is covered chipboard. The adhesive die-cuts in the kit coordinate with the On Board accents, so I didn't even have to sand this. All the embellishments, including the "ribbon" came from the kit. I stamped the "happy" with white craft ink, and the "days" with Cool Caribbean.

And for those that were curious about the tag dimensions on the holiday tag card, like I said, it's 4-1/2 x 10, scored every 2.5 inches. The decorated panels on each section are 2-1/4 by 4. That's the basics, everything else would depend on what you are putting on the tag card.

Wednesday, September 20, 2006

Holiday Tag Card


Here's a project I started a week ago. I used the set Wishing You, and you guess it, more Holiday Thyme double-sided papers. The tag measures 10x4-1/2., so each panel is 2.5 inches. The tags were created using the tag corner punch. Tag toppers were made from circle punchouts folded in half, and punched with the horizontal slot. The dove on the 2nd panel was painted with modge podge, then sprinkled with glitter, twice. The little star border on the 3rd panel is the star image from the "just for you" stamped repeatedly. The little tabs on the 4th panel are halves of the large oval punch.

More Holiday Cards!


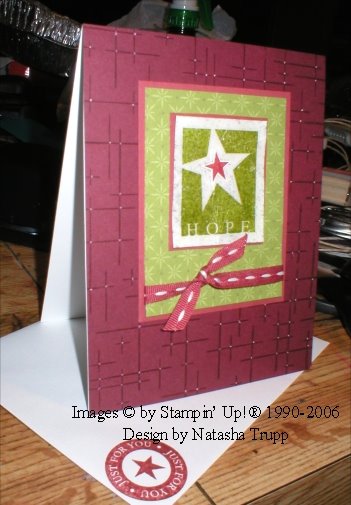
Well, it's that time again. Late Tuesday evening when my favorite challenge over at Splitcoast is posted, the sketch challenge! This card was a quick, easy card. I've seen a lot of cards accenting the little mid-points of the crosshatch background with white gel pen. I love the look, and did that here. It's a fast way to add a little something to your card. In case you haven't figured it out, I absolutely LOVE the Holiday Thyme double-sided papers, I think I need a few more packs! I'm also really enjoying my little Christmas Card challenge. Well, I guess challenge isn't the right word. Basically, I'm just having fun using all my Christmas stamps in different ways. This results in having several different holiday card designs. So, guess what, everyone on the Christmas list, is getting something different!

Anyway, here's the card. I use some glassy glaze over the main image and did some minor "cracked glass". Another thing I really like doing, is making coordinating envelopes. It just adds a little something else. Plus, I think it looks nice in the photograph :)

Saturday, September 16, 2006

Chipboard Buttons


Here's a quick card I made tonight. I've become quite obsessed with incorporating chipboard into my projects. Well, considering all that chipboard is, is die-cut cardboard, it will still set you back quite a bit. My solution... buy the huge "Chipboard Chunk" from Michaels when you have a 50% coupon! I have no desire to use most of the monograms and shapes as they come in this package. But now, I have pages of lovely chipboard shapes to cover!


On this card, I made a little chipboard button. I covered the rounded square with Holiday Thyme paper. Then I sanded it to make smooth edges. Then I embossed it with some ultra thick embossing enamel. Love that stuff, it gives everything such a beautiful shine! Lastly, I punched 2 1/8 holes in it and threaded it with ribbon. Now it really looks and feels like a button. The "noel" was stamped on with black Stazon to cover a smudge from the tweezers that I used during the embossing process (argg!).

Thursday, August 31, 2006

Simple Holidays


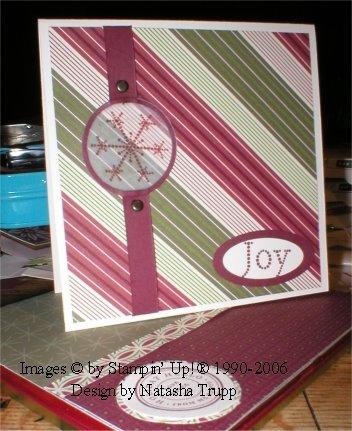
These new holiday papers make it really easy to make quick and classy cards. I made this 4.25 square card to go in a gift tin/door prize. I made a vellum tag, using the 1-1/4 and the 1-3/8 circle punches. Then I attached that tag to a thin strip of cardstock to give it a ribbon appearance. This card also uses the new oval punches to imitate the hodgepodge hardware look.

Tuesday, August 22, 2006

Family Pocket Book

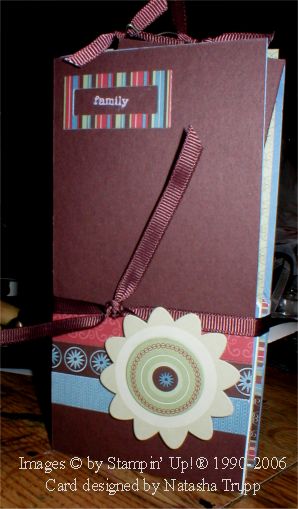
I love these little pocket books. They are ridiculously easy to make, they make fabulous gifts, and they are sturdy enough to double as a standing frame. These were featured in the June Stampin' Success, using the Petal Patch papers. My up-upline made a beautiful book using the new holiday papers (Holiday Thyme) and that inspired me to try one too. I used the Simply Scrappin' kit "At Home" to decorate. The only other supplies I used were some hodgepodge hardware, a few punches, and some chocolate ribbon.


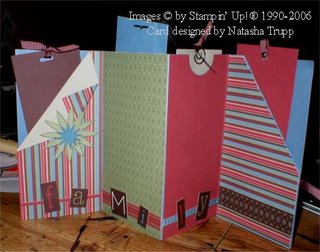
Here's the inside. The base is a piece of Buckaroo Blue cardstock, folded in half, scored every 3 inches across to make 4 panels. This type of project works well for showcasing just how far one of the Simply Scrappin' kits can go. The project looks were impressive, but it really doesn't use that much paper. I love it!

Sunday, August 13, 2006

Dreamy Chipboard


I so love using the new On Board chipboard, especially with the designer papers. Here, I've used the Sarah papers and the letters for "dream". The d is the only piece that is actually covered, and I've highlighted it here in this photograph. I also used one of the little flowers from the accents. I sponged classic Celery on it, then cut out one of the circles from the Sarah papers for the center. I was pleasantly surprised by how well the chipboard took the classic ink. The trick is sponge it so much that it looks like too much. Let it sit, as it dries, the colour absorbs into the chipboard. If you excessively sponged it in the first place, then plenty of the colour remains at the surface once dried.

The other letters were made by tracing the chipboard. I sponged around them to give a bit more definition (see inset)

Monday, August 07, 2006

Thoughtful Lion


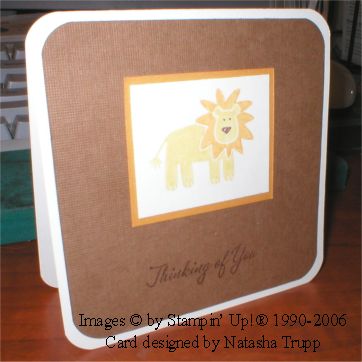
I just love this lion from the Wild About You set. I coloured in the eyes and nose after stamping it to make the face 'pop' a bit more. I love making this 4.25 rounded square cards. They are just so ideal for a little note. I made a set of 4 of these, using Bazzill Textured papers, and the elephant, giraffe, and alligator images from Wild About You. The sentiment comes from the hostess set, Warmest Regards.

Sunday, August 06, 2006

Mini Card Tin


I've had this little tin lying around for weeks, so I finally decided to make it into a little gift. With all the holiday pre-ordering, it's easy to forget about the things that were exciting a mere few months ago. I've been hoarding the Summer Mini papers, Petal Patch. What better time to use them then now. The little frame on the lid is some covered On Board chipboard. I love that stuff! The only stamp on this project is the tiny 'hello' from Amazing to Zany.

Eat Cake! Wedding Cake, that is...


So I haven't even touched the "Eat Cake" stamp set since I got it at convention. I remember seeing a lovely sample that used the cake for a wedding card, so I thought, why not use the present for a wedding card. I used black, silver, and white for my colour scheme to keep it simple, yet classy. I also made the card a longer style, ideal for a check (it measures 6x3.5) .

Blue Spots


I made a pink congratulations baby card last week, but I realized that this layout and this combination of stamp sets can really be applied in any colour and for almost any occasion! So here's a blue thank you version that's going out in the mail on Tuesday!