Wednesday, October 18, 2006

Aubergine Petals


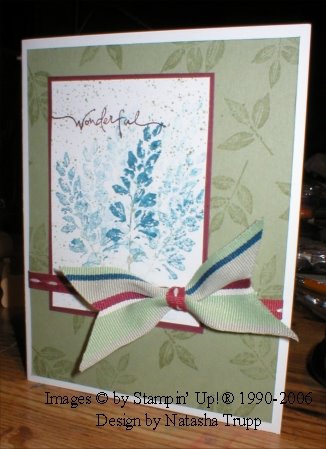
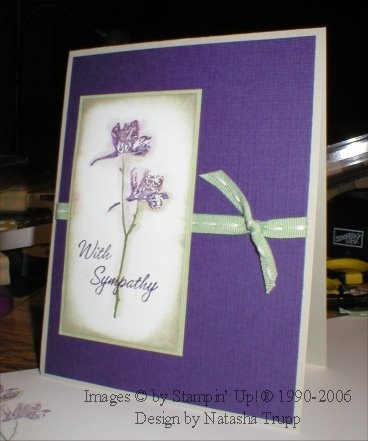
So here's a sympathy card. These types of cards aren't the funnest items to make. They are also not the easiest. You don't want to choose the colours, the wrong images, or too many embellishments. Fortunately, this was a commissioned sympathy card, and not one for personal. My grandmother phoned requesting one for a friend of hers (although on the message, she stated she needed a birthday card, so imagine my surprise when I called her back asking for details about the recipient and I was given the information that this wasn't to be a birthday card, but a sympathy card. Wow, how quickly that changes your mindset). So here it is, I pulled out a retired favorite. These flowers work well for somber events. I used textured cardstock because it adds to the card without being overwhelming.

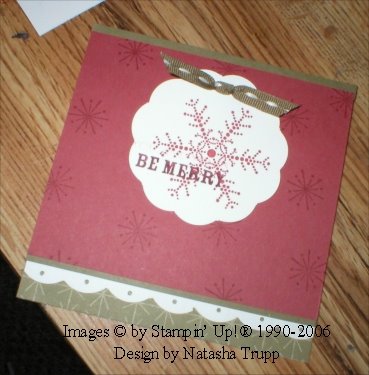
Be Merry


This is one of those cards that I really wanted to be awesome, but I think it turned out just okay. I've got a meeting on Saturday morning with my up-upline and sidelines, and we do swaps. Unfortunately, I planned and prepared all the pieces for this one before actually assembling a prototype. So now I don't want to change the design too much, since I've got all the pieces. I blame the cold for not thinking things through clearly. Since I really enjoy making the scalloped edges with the corner rounder, I wanted to show them that. I just still want to keep adding to it, but I'm not sure where. I tried matting the snowflake piece on a thyme circle, didn't like how it look. Maybe some more designer paper? We shall see. For now, I figured it's been since Monday since an update, so here it is. I also want to send a big thanks to the great Julie Ebersole, for sharing the ultrasimple way to get the bow/knots to look so good! It's such an easy method, that I never would have thought of it. Her blog is here: http://papertrufflez.typepad.com/

Monday, October 16, 2006

Welcome!


Here's some more cards using the corner rounder as a scallop punch. The circles and the bottom edge both use the corner rounder. I just wanted to make something simple, yet classy, so this is what I came up with. In the top corner of the photo an inset of the inside of the card, I continued the scalloped theme in there.

Thank you friend.


I love the look of all those scalloped circles that are ever-growing in popularity. I have not seen any of those punches available for purchase locally, so what do I do? Try to get the look using what I've already got! I used a circle cutter to cut out a 3 inch circle, then I used my corner rounder. Carefully remove the base (the corner guide), then pick a starting point on the circle. It takes a few punches to get the hang of it, but once you know how to line it up, it's actually quite quick. This also works for straight edges, that's actually easier. I'm in the middle of making a card with a scalloped bottom, look for it tomorrow!

Sunday, October 15, 2006

Sunday Morning Fun


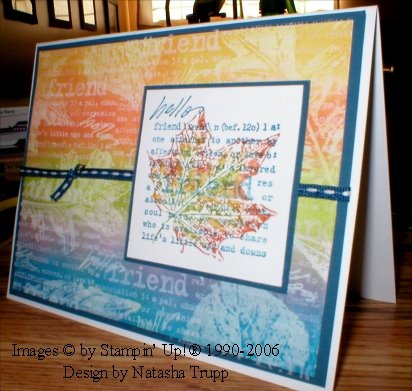
Well, it's no longer Sunday Morning, but I did make this early today. I saw this gem by Vera at SCS (Country Blessings Shoebox Swap) and was immediately inspired. I love the look of the ghost stamping. I used a different autumn leaf set, and I do not have a spectrum pad, so I sponged,swiped, and blended the same colours. I also added an acetate overlay stamped with the "friend" stamp from Lexicon of Life.

Saturday, October 14, 2006

Hang Ten


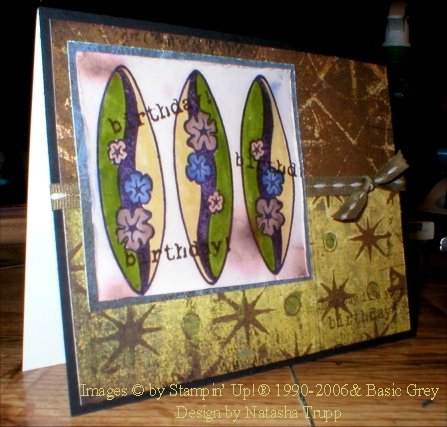
I went to a local scrapbook store today. I picked up a package of the Basic Grey Hang Ten papers. I checked the price, then sadly set them down. The saleslady comes up to tell me, "that's the last package, it's 50% off!", so that changed my position on them. I also picked up some other Basic Grey papers, from the Gypsy line, and some Wholy Cow rub-ons. I hadn't used those before, not sure why, because they are so cool and so easy to use (that's a later project, maybe for here tomorrow). Anyway, so with new Hang Ten papers in hand, it only seemed appropriate that I use the Do The Hula set! I also used the greeting from It's Your Birthday (the one with the aged font look). The paper that the surfboards are stamped on was soaked in an ink-water bath. Then, while it was still saturated, I dribbled a few reinkers on it. Because the paper was so wet, the reinkers floated around nicely which ended up producing kind of a backwards tye-dye effect.

Friday, October 13, 2006

More Autumn Birthdays


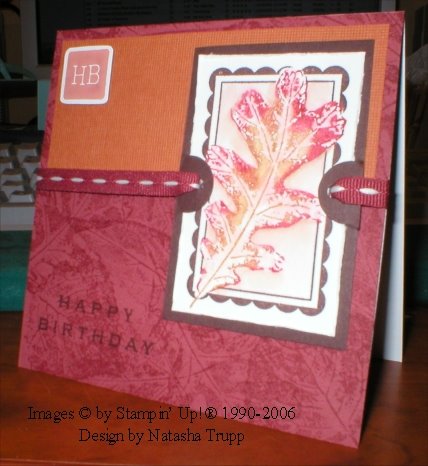
I felt like making something this morning. I watercoloured the leaf in the label last night, and didn't know what to do with it then. However, this morning, a layout came to me, and this is what I made. It's funny, making these autumn cards, we don't even have any leaves in our yard. We are in the midst of this crazy wind storm ( I don't really know what to call it), so our tiny trees are leafless, and those few leaves are long gone.

Thursday, October 12, 2006

Big Birthday Wishes


I had submitted this card to a publication, but it wasn't accepted, so here it is! All the circles on there are chipboard covered with designer paper or plain paper. I printed the greeting on textured cardstock, then attached it to the chipboard. I liked the look of giant pretty buttons, so that's the theme I was going for here. This card is quite huge, it's 8 x4.

Wednesday, October 11, 2006

Autumn Birthday


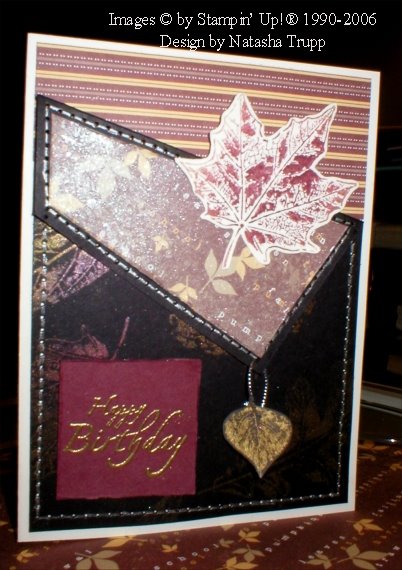
This card was based off of this week's sketch challenge. I really liked the challenge because I could see all sorts of neat ways to use different stamps for it. I just made the one card so far, it took a little longer than I intended, but I'm really happy with it. I used faux stitching, distressing, poppin' pearls, embossing and poly shrink on here. The card is actually slightly smaller than the standard size. I started with a scrap piece of decorated black paper, and just cut it while not really paying attention... Oops! So the whole card is about a 1/4 smaller than the normal. The leaf charm is the polyshrink, I stamped the leaf in gold ink than shrank away. The big leaf is in burgundy with gold ink on the tips, it gives it a lovely subtle shine. I also used the 4 seasons paper on here. I coated the one side with pearlex alcohol spray.

Tuesday, October 10, 2006

Breathe of New Life


I really wasn't feel that into creating anything tonight. It was kind of crazy day at the pharmacy (over 270 prescriptions!), so I was feeling a little spent. However, the colour challenge was very inspiring. I decided to pull out one of the first sets I got. These colours certainly bring a fresh new life to any stamp set. I was looking through my embellishments, and noticed that not only do these rhinestones match 2 of the colour challenge colours, but they are also the perfect size for the All the Best flower centers!

And now for something not directly stamp related... I almost always have the itunes blasting in the background, so I thought I'd share my incredibly eclectic top ten songs (can't say I didn't warn you!) that are my favorites right now. I would love to hear your top ten music list for stamping to!
Here's mine:
  1. Snow (Hey Oh!)- Red Hot Chili Peppers
  2. Kiss on the Mouth- Our Lady Peace
  3. Tangerine Speedo- Caviar
  4. Singing in my Sleep- Semisonic
  5. Phenomenon- LL Cool J
  6. Save Yourself- Stabbing Westward
  7. Hey Ya- Outkast
  8. Anything from the Amelie soundtrack
  9. All Uncovered- The Watchmen
  10. Sugar We're Going Down- Fallout Boy

Monday, October 09, 2006

Measure of Life


Way back in April or May, I got this hostess set. I specifically chose it because it wasn't my typical style, so I really like working with it and trying to produce cards that stretch my usual pattern of creativitity. This one was inspired by the technique challenge at SCS. The technique was to use dots of colour like Monet paintings. The method to this technique was discussed, but it didn't really work out for me, so I just went with a general Impressionist painting look. I saturated the image with water, then went in with the crayons and coloured using tiny strokes. I also used twill tape for stamping on for the first time, and I really like how everything turned out! I had heard about ink bleeding on the twill. I used stazon, and it's good! No bleeding, fading, or streaking! To make the sentiment pop a bit, I framed it with the pewter hodgepodge hardware.

Just a little observation, I was just browsing through the Measure of Life gallery at Splitcoast, and I noticed that very few people use the dragonfly this way. Isn't that interesting?

Well...where is it?


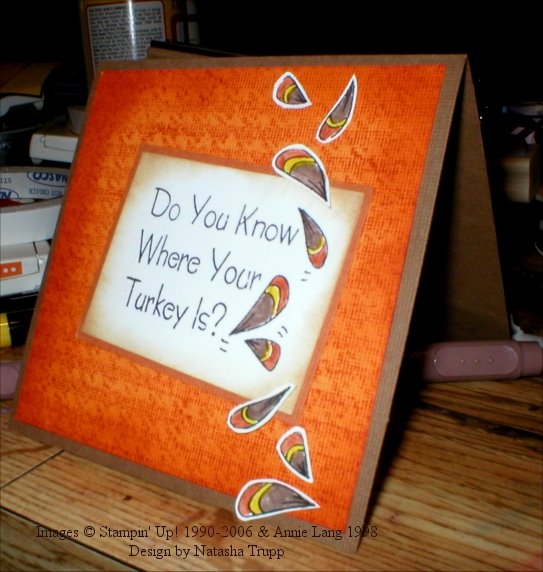
After an evening of eating turkey, discussing tofurkey and turducken, it was only appropriate to bring out this stamp. I received this stamp as a joke a few Christmases ago. I had seen it at a craft store around Thanksgiving and joked about it. It showed up in my stocking the following December. I had also promised my sister that I would make a Thanksgiving card with it this year. Happy Thanksgiving! And even if today isn't the day you celebrate Thanksgiving, it's always a good time to take time and think of things to be thankful for.

Sunday, October 08, 2006

Giggle


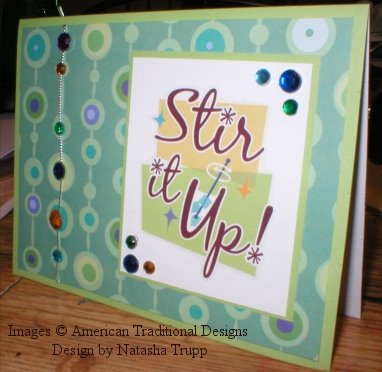
You remember those hilarious beaded strings that you'd put in your doorway. Well, I was inspired by those for this card. Sometimes, when you make a card, you just kind of laugh the whole time. This is one of those cards. I guess I was just so amused that I took my inspiration from those beaded door decorations. The paper is from American Traditional Designs, Celebrate collection, and the image comes from the After 5 collection. I'm not what you would call a big party-er, but I love the fun, retro images from the After 5 collection. Other items on this card are rhinestones and silver cord. I attached the rhinestones with glue dots. While doing so I was trying NOT to think of the fact that I was using 12 glue dots on 1 card. I know I buy these things so I can use them on my creations, but sometimes you just want to keep it all just sitting nicely in your collection.

Saturday, October 07, 2006

And now for something completely different...


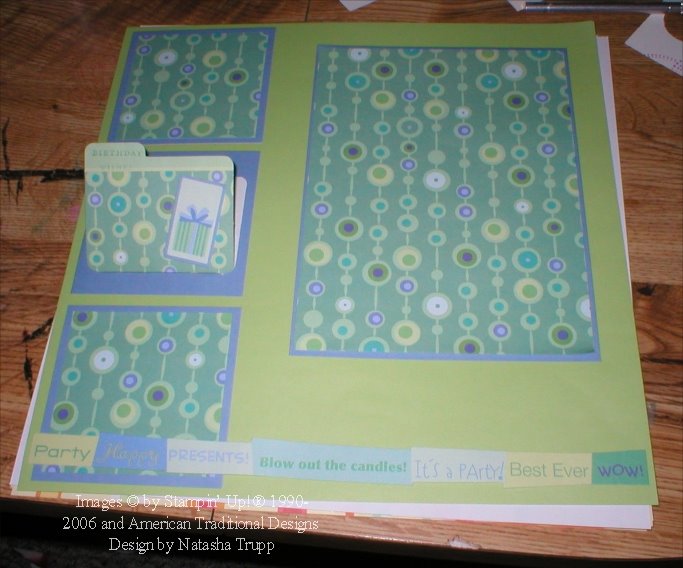
What's this? A scrapbook page. It figures, it's takes a proclamation of a "National Card-Making Day" for me to feel like scrapbooking... I don't have the pictures for this yet. I figure, do the layout, then take the pictures. This is a birthday page, so I'll theme it around that. The little file folder will have a little journaled Birthday Wishes wishlist inside.

But never fear, I did make a few cards tonight, and I will make a few more. I kept the designs pretty

simple. First I made a little 4.25 square donut card. The sentiment is raised on a dimensional and placed on the inside of the card. I didn't originally have the little ribbon staple tag, but the card was begging for something else to make it have that magical design of having odd numbers. I'm still not sure about using staples on cards, but I've tried it a few times and not been entirely unhappy with the results.

And finally... I really wanted to use the big ribbon from the Prep School Ribbon Originals set, but it's so big! So I made a pretend bow, tying it in the center with other ribbon. It ended up being pretty overpowering, but I like it anyway.

Friday, October 06, 2006

Fall Friday


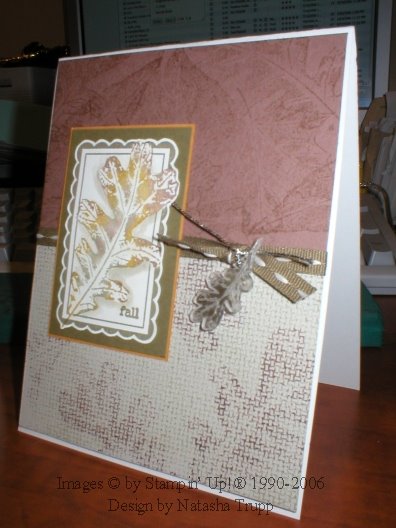
Love the Limited Supply Challenge today. I only recently got the Autumn Leaf Prints set, and I LOVE it, so I love having any excuse to use it. I used several quick techniques on this card. The leaf was stamped using multiple marker colouring/blending, then shadowed with watercolouring. I masked the leaf to stamp the label. The cocoa layer is a collaged stamping of all the leaves in this set. The bottom is a form of kissing. I inked up Aida Cloth in Sahara Sand, and stamped the oak leaves directly onto the background stamp in chocolate chip. It's really cool how up close you don't notice the leaves so much, but farther away, they really pop. I also used polyshrink to make the little oak leaf charm. I love that stuff for making perfectly coordinated embellishments!

Wednesday, October 04, 2006

Easy does it...


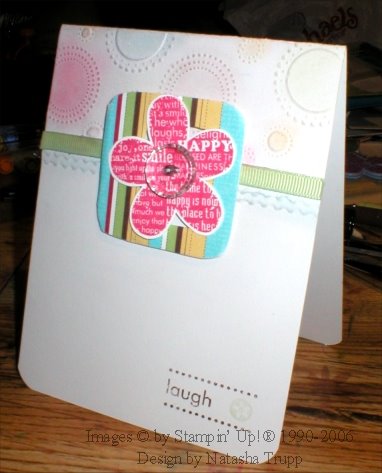
For this card I wanted to replicate a style I see a lot with "trendy" mass-produced cards. You know, the ones that cost at least 5 dollars.

I wanted this card to be all about different textures. There's the smoothness of the paper, the glossy shine of the button, the fabric of the ribbon, and lastly the dry embossing. The striped designer paper is covering a slide mount-shaped piece of chipboard. There's a clear button on top of the flower. I did the dry embossing to give the slightest illusion of designer paper. I had it plain, but decided to dab on some of the coordinating chalk colours from the designer paper. And to "round" it all off, sorry about the pun, I used the corner rounder to finish it nicely for the bottom corners.

Tag Belt Card


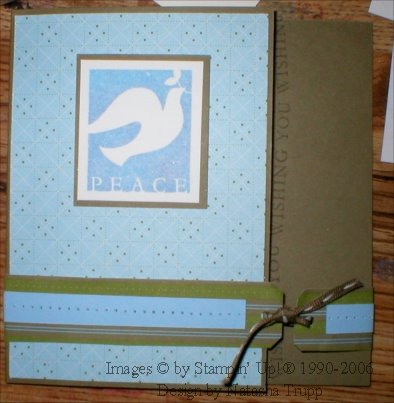
This is another relatively simple card, but it's got a fun little twist, it's a belt card. I used the tag punch to make the belt ends. To do this, take a long strip of paper that is more narrow than your tag punch, (this here is 7/8). Bring the piece of paper through the punch until you get to the desired length. Then attached your belt pieces. I decorated the designer paper with some pierced bashful blue, and tied the pieces together with some stitched true thyme ribbon.

Tuesday, October 03, 2006

Simple Thanksgiving


Well, Thanksgiving is this next weekend, and even though I don't usually make cards for it, I thought why not? Here's a nice and simple design. I was looking for interesting ways to use buttons as embellishments. I saw this example in this year's IB&C. The button was used as the corner focal point in the sentiment. For this card. I used the French Script and Aida Cloth Backgrounds, as well as the Autumn Leaf Prints set. I rock'n'rolled the leaf in rust then in burgundy, and then misted it with water. I stamped that onto vanilla, and misted the paper. Then I splattered some ink over top.

Just a word about doing the focal corner embellishment, stamp the entire saying first! I had stamped the "Happy", then almost glued on my button. Don't do that, as it makes using the stamp-a-ma-jig nearly impossible. Luckily I caught myself, and so I put the button on the side, marked its location with an x, and then stamped the "Thanksgiving". There is also some distressing on the pumpkin layer beside the aida cloth burgundy strip.

Monday, October 02, 2006

Wishing You... (you guessed it) happiness!


I just saw my last 2 post titles had the word happiness in the title, so let's make it a trilogy! I keep making "happy" cards that I haven't even been entirely happy with. I don't know why, I guess, I keep seeing all these amazing creations lately, and I don't want to, but I constantly compare my work to them. I'm just having difficulties getting into the groove. You know, the one where you make a card, and look at it, and think "wow, I really made that!". Maybe I should take a day or two off from the stamping, I don't know. Perhaps this week's challenges will re-inspire me. Perhaps it's just too late in the evening...

Anyway, here is the creation of tonight, I did some things I hadn't done before, like age my own paper. I soaked some designer paper in water and Close to Cocoa reinker. It gave exactly the effect I was hoping for. The hula lady is coloured in with markers, I sponged a bit around the sides, using the inward swiping motion, and it's hard to see, but over top of the hula lady is a piece of acetate with the word "happiness" in white stazon.

Sunday, October 01, 2006

Tropical Happiness


The inspiration for this card came from Valerie Stangle on SCS. I loved her pairing of the Do the Hula with the Happy Everything set. I really love using Do the Hula because I love having an excuse to use bright colours. I'm not usually a fan of tearing or staples on cards, but I felt like it really worked here.